Thursday, October 6, 2011

Mango Raspberry Smoothie

I found out that this week one of my friends is going on a 10 day raw fruit smoothie cleanse! Yay! I'm so glad I can inspire my friends to try new things and explore food! I'm dedicating this post to all those who are trying new things!

The base of this smoothie is really the mango.  It gives a thickness and a creaminess to the smoothie that is so luxurious.  This is a great quick breakfast or snack, and is packed full of vitamins and nutrition. 

Mango Raspberry Smoothie
1 large mango, peeled and cubed
1 large very ripe banana
1 package of raspberries (or 6 oz of frozen berries)
1 apple cored and cubed (optional)
Ice (optional)

1. Put everything in the blender and blend until smooth. Enjoy!

Wednesday, October 5, 2011

Chewy Pumpkin Cookies


Usually I am a die hard chocolate chip cookie fan but in the fall I love the flavor of pumpkin.  To me it's just an added bonus that pumpkin is also good for you.  I think it's even better for you when paired with chocolate! I adapted this from a recipe on Have Cake, Will Travel.


Chewy Pumpkin Cookies (Yields 12 large cookies)

1 C. Whole Wheat Pastry Flour
1 C. Ground Oats (oats ground up in a food processor)
1 1/2 t. Ground Cinnamon
2 T. Arrowroot Powder (heaping, very heaping)
1/2 t. Sea Salt
1 t. baking powder
1/2 C. Vegan Butter (or vegetable shortening)
1 C. Palm Sugar (other other vegan granulated sugar)
1/2 C. Honey (or other vegan sweetener)
3/4 C. Pumpkin Puree (be generous)
2 t. Vanilla Extract
1 C. Chocolate chips (you can put in slightly less if you don't like as much chocolate)

1. In a large bowl cream together the sweeteners and the butter or shortening with a mixer.  Add in the vanilla and pumpkin until combined. 

2. Mix together the dry ingredients in a separate bowl.  Fold them into the wet ingredients and mix until combined.  Add the chocolate chips and stir again.

3.  Using a spoon place dollops of cookie dough on a greased cookie sheet and shape them how you would like them.  They wont rise much so flatten them a little.  Put in the fridge until dough is chilled.

4. Preaheat oven to 350F and bake for 17 minutes or until golden brown on the edges.  It may be hard to tell if they are done but a good way to check is to look at the bottoms.  Nicely browned bottoms mean they are done :)

Notes: Baking these too long will cause them to dry out.  If you don't want to bake all the dough you can always freeze some in cookie shaped discs for later!  Store in a sealed container on the counter. 

Tuesday, October 4, 2011

Scrubby All Purpose Cleaner- Save Money, Be Green!


So I usually blog about food because I am a foodie but I am also into something else; saving money and being green all at the same time.  Having helped a lot of friends move I have inherited an impressive number of random cleaners and cleaning supplies.  After three years though the collection is significantly depleted and I've had to get more creative with what I have.  Let me give you some examples.

1. Did you know that window cleaner makes excellent toilet bowl cleaner? So does vinegar, Soft Scrub, bleach, and Simple Green.

2. Scrubby cleaners like comet work great for cleaning your kitchen sink, but filling the sink with water and adding a little bleach works better and requires no scrubbing :)

3. Newspapers, not paper towels, work best for cleaning windows.

I think you get the idea.

There was just one thing that I didnt have a cleaner for: the oven.  I had noticed that after 3 years of intense (daily) usage that my oven had developed a fine layer of ash at the bottom.  Which experiment of mine was responsible for this ash I have no idea but I thought it might be best to clean it off, given that the oven was starting to smell like smoke.  And that is what leads me to this cleaner, my gift to you.  Save money, clean things, and prosper.


Scrubby All- Purpose Cleaner
1 Part Table Salt (not iodized)
1 Part Baking Soda

Combine in a container, preferably one with a shaker top like an old spice jar.  Easy, right?

Wet the surface to be cleaned.  Sprinkle on cleaner, leave for 5 minutes.  Scrub lightly with a sponge.  Rinse.

I use this on all my sinks, the tub, the oven.  Any where there is a enameled like surface. Obviously you will want to test an area if you are not sure.  This cleaner easily cuts soap scum and somehow my tub takes longer to get dirty after using this than when I use a commercial scrubbing cleaner.  Store in a sealed container.

Helpful Hint: If you want it scented you can add a few drops of essential oil.  However the scent may not last very long if you make a big batch of this cleaner and store it. You can also add lemon, lime, or grapefruit peelings (I've had more success with this), just make sure they are in small enough pieces that its ok if they go down the drain.

Monday, October 3, 2011

Thai Pumpkin Coconut Soup

Happy Vegan MOFO everyone!

Now that fall is in full swing I'm totally into pumpkin, squash, and soup; preferably all together! This soup is one of my favorites and is frequently requested by dinner guests.  I make it several times during the fall and winter and the flavors never get old.  Don't be fooled though! This soup uses easy to find ingredients, is pretty quick to make,  and is in no way rocket science!


Thai Pumpkin Coconut Soup
16 C. Water
1 medium onion, very small dice
6 Boullion Cubes (I use Rapunzel brand, no salt added)
1 can coconut milk
1 T. Fresh Ginger, minced
1 Package Soft Tofu, cubed
1 Large Butternut squash, peeled and cut in bite size pieces (about 3 cups)
3 Large Sweet Potatoes, peeled and cut in bite size pieces (about 3 cups)
3 T. Soy Sauce
1 T. Salt
1/2 T. Pepper
1 t. Ground Cumin
1 T. Parsley
1 t. Dill
1 t. Basil
3 cloves of garlic, minced
Juice of one large lemon
1 t. Tumeric
1 t. Chili Powder
3-4 Generous handfuls of baby spinach, washed

Optional: (add at the end)
1-2 t. Thai Chili Sauce, or 1/2 t. Dried Chili Flakes, or 1-2 Fresh Red Chilies Sliced
2 t. Agave (add to level out the spice if needed)
Juice of 1-2 Limes (if you like extra citrus flavor)

1. In a large stockpot saute the garlic and the onions in olive oil until the onions are translucent and the garlic lightly golden.
2. Add the water and the bouillon cubes.  While the bullion cubes are disintegrating in the water cut the squash and the potatoes and add them to the stock pot.  Bring to a boil and after 7-8 minutes check on the potatoes and squash.  When they are cooked reduce the heat to low and add all of the other ingredients except the tofu and the spinach.
3. Shortly before you want to serve the soup add the tofu cubes and allow them to warm through.  Add the spinach and stir.  Allow the spinach to wilt.  Serve immediately.  Enjoy!

Notes: This soup makes excellent leftovers and is good with or without bread. The spinach doesn't get weird even after a few days. This soup can also be frozen (without the spinach and tofu).  Experiment with the spices and don't be shy about trying more or less of the flavors you like!  This soup is about bold flavors, so don't be shy!

Monday, September 26, 2011

Vanilla Chai Pear Butter


The other day I wasn't feeling so good.  It was raining, I had a headache, and I had to run a lot of errands when I would have rather been snuggled up inside reading a book and drinking hot tea.  When I finally got home after running the errands I was determined to do something that I wanted to do. What I wanted to do at that moment was make pear butter.

I have fond memories of eating preserved pears right out of the jar when I was a young child.  The syrupy sweetness and softness of the canned pears was my favorite part.  Even though my mom only canned the pears from our tree (or anywhere) once I still remember eating them to this day, more than fifteen years later. I've learned the hard way not to try and re-create the memories of things from my childhood (often ends in disappointment) but I decided to honor those memories with this pear butter.


Vanilla Chai Pear Butter (Yields  four 8oz jars)
8 Pears (I used 4 Bosc and 4 Bartlett)
1.5 inches of cinnamon stick
6 cardamom seeds
Juice of one lemon
1/4 to 1/2 C. Honey or vegan sugar (adjust depending on how sweet you like it)
2 t. Vanilla Extract

1. Peel and core the pears.  Cut into small chunks and put in a crock pot.
2. Add the cinnamon stick and cardamom to the crock pot and allow to simmer for several hours until the pears are very soft.  Remove the cinnamon and cardamom when you are happy with the taste/aroma.  I left mine in for around 3 hours but you may want more or less flavor.
3. Allow pears to cool slightly then transfer to a blender and blend until smooth.  You may have to do this in a few batches, be careful of blending hot things!
4.  Return butter to the crock pot and continue to reduce if necessary. Add the vanilla. If the consistency is how you would like it simply heat the butter until it is just shy of boiling and then put in canning jars.  Water bath can for 15 minutes.

Notes: I know there is a lot of controversy surrounding whether or not to water bath these after canning.  I have made fruit butters many times and not always water bath canned them after. For safety I would put these in a water bath though.  Better safe than sorry!  I'm lucky if the butters last longer than six months since I usually give them away as gifts.  I also use very very ripe pears for this recipe.  Should you not want to can this butter you can allow it to cool and freeze it.  Enjoy!

Five Minute Applesauce


I like applesauce. I think it's natures candy and I love it. It's simply one more thing in life that I greatly appreciate. 

Unfortunately I think the stuff they sell at the store is only good for baking and instead I buy apples and make my own.  There is one thing that Michigan does really really well, and that is growing apples.  So when I saw Michigan apples at the store on sale I bought two bags.  This recipe is super easy, takes 5 minutes, tastes like you spent all day making it, and can be stored in the fridge for quite a while (if there are leftovers).


Five Minute Applesauce
6-7 medium sized apples, cut off the core (no need to remove the skins, adds some texture)
Cinnamon, to taste
Maple syrup (optional, depending on the apples it could be plenty sweet without)
Pinch of salt (optional)
1/2 C. Water

1. Put everything in your blender.  If its having trouble blending you can add more water, but not too much!
2. Blend until smooth.
3. Heat in a sauce pan over the stove until warm (do not boil!) Enjoy!

Notes: If you made too much and you want to store some I put hot applesauce in mason jars with fresh lids and as they cool they suction the lids down.  The applesauce is safe like this for a few days, after that put it in the fridge where its good for a few weeks.  I use this in baking instead of eggs or to give things more moisture, and also use it as a topping for my Easiest Ever Ice Cream.

Monday, August 22, 2011

Limeade Means Summer!


So every summer I find myself craving citrus and nothing will do except for a tall cold glass of limeade.  Sometimes there are a few lemons in there.  I usually just squeeze the juice out of whatever is lying around the house, whether lemons, limes or grapefruit, and make a light citrus drink. 

I also have another confession.  I'm addicted to raspberries, yes, raspberries.  I'm perhaps more addicted to raspberries than I am to ketchup.  Just last week the grocery store had a sale on raspberries, 10 for $10, and I wanted more than ten so I convinced my extremely awesome and accommodating significant other ;) to also buy another ten.  So twenty 6 ounce containers lasted us approximately 5 days....no I'm not joking.  I'm even considering going to pick up more so some might actually get frozen.  I even bought another five packages since they were on sale again today.  But how can you say no to those raspberries? I can't...

Which brings me to limeade and summer things...again.

Limeade, all natural hair lightener, ice cold water= necessities of summer!


Limeade/ Lemonade
Juice of 3-4 lemons or limes (don't be afraid to mix them up!)
2-3 cups of cold filtered water (depending on how strong you want it)
Agave to taste

1. Mix everything in a large glass or small pitcher making sure to stir really well to incorporate the agave fully. 
2. Lay out in the sun, or shade, and enjoy while your neighbors look on with envy. 

All Natural Hair Lightener
Juice from one lemon
2 T. Honey
1 C. Water
1 T. Olive oil

1. Mix everthing thoroughly in a sealed container.  Shake well before each use.
2.  Its helpful to put some of this in a spray bottle for application.  Dampen hair, let it dry in the sun, re- apply every 4 hours.
3. Store mixture in the fridge.  It will stay good in there for approximately one week.  It may take several days for you to notice a difference in the color of your hair but from my experience natural blondes have the best results.  Enjoy!

Monday, August 15, 2011

Chilled Cantaloupe Soup


Each and every summer time just gets away from me.  I know its been unforgivably long since my last post and for that I am truly sorry.  It must have been terrible going without awesome vegan food. :P

Things have gotten pleasantly busy over the last month.  Fortunately I have had some spare time to cook delicious vegan things which I will attempt to share with you as often as possible as we reach towards the end of summer.  I made this soup during a particularly hot week and it was incredibly refreshing.   This can be served in a traditional bowl, or in shot glasses as "shooters" which is a good appetizer.  I personally just like how easy it is and how people seemed to be impressed and curious about it at the same time. 

Chilled Cantaloupe Soup:
2 small cantaloupes, peeled, cut in chunks
1 t. dried tarragon flakes
Juice of two large limes
1/3 C Fresh cilantro, packed
2 small shallots
1 t salt, or to taste

1. Sweat the shallots making sure to not let them brown at all.
2. Add all ingredients in a blender and blend until very smooth.
3. Refrigerate a few hours to overnight to allow the flavors to mingle. Taste and adjust spices/lime to your liking. Serve chilled.

Notes: DO NOT use onion in place of the shallots, the soup comes out tasting like vomit :( Also feel free to be generous with the lime and cilantro. Enjoy!

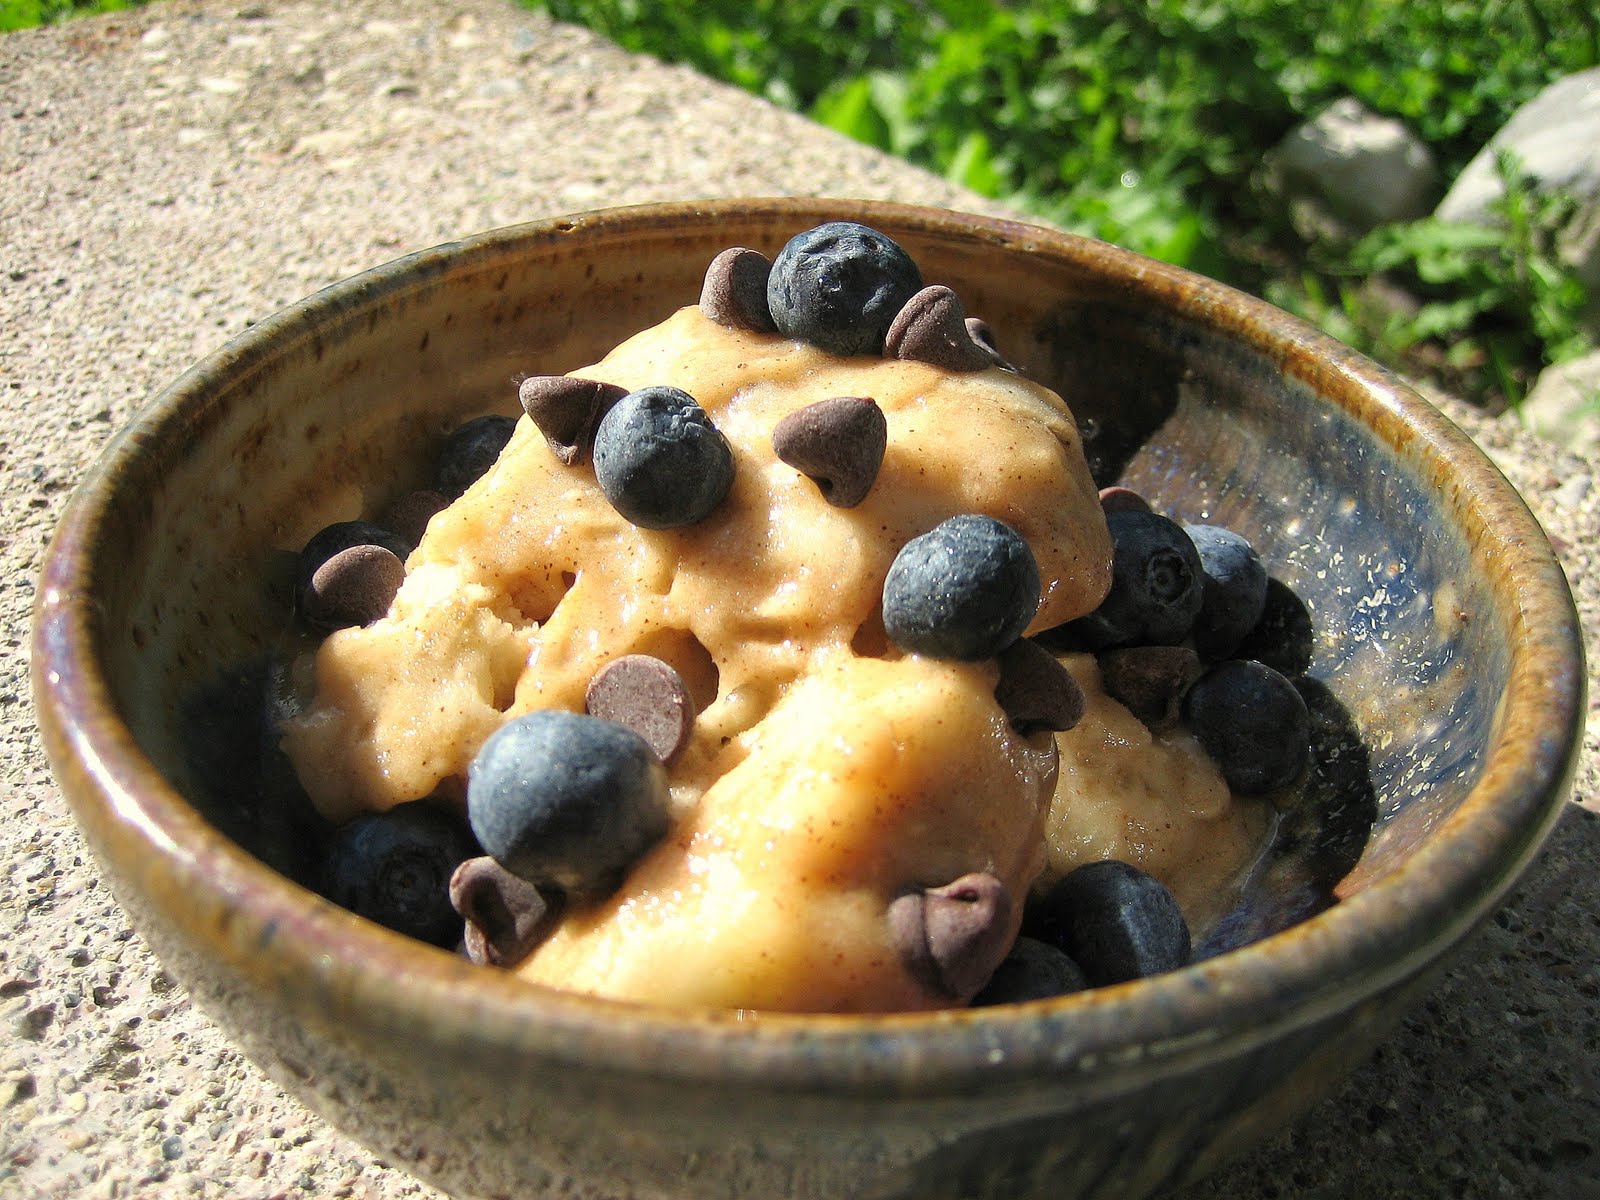
 Here is the photo I promised of the banana ice cream! Mine is topped with chocolate chips and blueberries but there are many many toppings that are delicious!

Saturday, June 18, 2011

Easiest Ever Ice Cream!


So last week was what they call "Restaurant Week" which is where several restaurants participate in offering deals for lunch and dinner (sometimes both!).  Sometimes they have special menu's they prepare and it's always a great way to try out new foods, and lots of them!

So that is my excuse for having not cooked in a week.  I did however decide to make some of this ridiculously easy ice cream which tastes delicious. It's a little bit like the consistency of frozen yogurt, but in my opinion it tastes better.

Photo taken by kitchen partner Dan :)
Ice Cream

Very ripe bananas, cut into 1/4" slices


Optional Flavorings
Vanilla Extract
Lacuma (gives it a caramel like flavor)
Any other kinds of fruit (my favorite is mixing in blueberries at the end)
Cocoa Powder
Peanut butter

1. Line a cookie sheet with wax paper.  Spread out banana slices.  Add another piece of wax paper on top if you need room for more slices.

2. Cover with plastic wrap.  Freeze a few hours or overnight.

3. Blend 1-2 cups of frozen banana slices at a time in a blender.  Note: The more powerful the blender the more banana slices you can add at once but be conservative at first! Use a spatula to scrap down the sides and pulse the banana until creamy.

When it comes to adding flavors its better to add too little and have to add more than to add too much at once.  If you are using a flavoring like cocoa powder (I have some that is raw) you may need to add some agave nectar or other sweetener.  You can eat this plain, which is what I do, or mix in some fresh fruit for some extra pockets of flavor.  Contrary to what you would think this is not overpoweringly banana flavored. I like adding some homemade vanilla to mine and maybe a crack of sea salt. :)

Once frozen the bananas can be transferred to a zip lock bag and kept in the freezer for quite a long time if need be.  Some times I have this "ice cream" in the morning instead of my normal breakfast smoothie. 

I apologize for there being no end picture.  I will try my best to remedy that soon! I just wanted everyone to be able to enjoy this recipe while the weather holds!

Saturday, June 11, 2011

Kickin' Ketchup - Incredibly Addictive

So since I've been making some confessions lately I figure I shouldn't stop now.  I am addicted to ketchup.  At first I thought it was simply the white sugar it contained but after switching to agave sweetened ketchup I was still buying it in bulk and purposefully making things to put it on.  Back in the day I bought ketchup in 64oz containers, they were like the free weights you would use at the gym.  Yes, I think it's safe to say I have a problem.


But from my addiction sprang something even better than store bought ketchup.  This ketchup is not just one straight up flavor.  It has layers of complex flavors.  Its savory, thick, and doesn't separate (no more ketchup water!). I want to spread this stuff on every thing from veggie dogs (done), garlic fries (done several times), toast, sandwiches, pizza, and really any form of potato.  I can't help myself.  It's that good.

Kicking Ketchup

Makes about 3 1/3 Cups

2 12oz cans tomato paste, no salt added
6 cloves garlic, minced
2 T. Olive Oil
1 T. Onion Powder
2 T. Balsamic Vinegar
2 T. Apple Cider Vinegar
1/4 C. Honey
1/4 C. Agave
1/2 T. Chili Powder
1 T. Parsley
1 T. Dill
1 t. fine Sea Salt
1/2 t. Fresh ground black pepper
1 t. Hot Sauce (I use Tabasco Habanero hot sauce, pictured above)
2 T. Warm water

1. In a medium sauce pan saute the garlic in the olive oil until just golden brown. Remove from heat.

2. Add all other ingredients.  Start with the liquids (to stop the garlic from cooking further), then add the spices and tomato paste.  Stir thoroughly to combine everything.

3. Heat on medium low for 5 minutes, stirring frequently if not continuously (you don't want it to burn!).  Make sure to scrape the sides and bottom of the sauce pan.  Remove from heat and allow to cool completely before refrigeration. 

Notes: I store my ketchup in an old squeeze bottle that used to hold agave but any bottle will do.  I've also put it in mason jars (they make great gifts!) and just used a spoon to smother whatever I'm eating.  This ketchup is really best when it has time to sit over night.  You can use it right away but the flavors really get better after it's had a chance to sit. 

I've been asked a lot if I have tried canning this.  I have not (yet!) but since it's very acidic you probably could.  In the future I will try it and let you know how it goes.  I might attempt it before Christmas so I could add a small jar to the gift baskets I make.

Now, go forth, fearlessly into your kitchens and create this sauce from heaven.

As a bonus, if you successfully can this recipe (with few alterations) and tell me how you did it I will mail you a wonderful gift as a thanks!

Hot Ketchup