Showing posts with label Breads. Show all posts

Thursday, February 2, 2012

Pumpkin Cinnamon Rolls


Happy Groundhog Day!

So because it is my birth month I've decided to indulge myself a bit during the next 30 days.  I decided to start with these magnificent cinnamon rolls! As cliche as it is to say this, it's true that you can't eat just one! I put pumpkin not only in the bread part but in the filling as well to give it a nice velvety texture and sneak in some extra vitamins. So I guess you could argue that these are healthy? Maybe? No? I'm going to pretend they are anyway.

Now this recipe uses the baguette recipe with some modifications.  You can always halve this or you can freeze extra rolls either before or after baking to save them for later.  This is not a "super easy" recipe, it does take a little bit of time, but its well worth it!  These do not need a glaze but if you would like one you could always add that on top after they've baked.

These cinnamon rolls have a distinctive pumpkin and cinnamon flavor, and are moist and delicious.  The bread part is a little more firm so these stay together better while you are eating them.  Don't be shy with the filling! It's really what makes these rolls great!


Pumpkin Cinnamon Rolls ( Makes about 22 Rolls)
Bread:
2.5 C. Bread Flour (plus extra for rolling out the dough)
1 t. Fine Salt
1/4-1/3 Honey (or other liquid sweetener, to taste)
1/4 C. Warm Water
3 T. Maple Syrup
2 1/4 t. Yeast (1 package)
1 C Pumpkin Puree
1/2 t. Ground Cinnamon
1/2 t. Pumpkin Pie Spice

Filling:
1.5 C. Walnuts
1.5 C. Pecans
1/2 C. Pumpkin Puree
1/2 C. Palm Sugar (or brown sugar)
1/3- 1/2 C.  Honey (or other liquid sweetener, to taste)
1/3 C. Maple Syrup
2-3 T. Ground Cinnamon (generous)
1/4 t. Ground Nutmeg (optional)
2 T. Vegan Butter
1/2 t. Fine Salt
9 dates, diced into pea sized pieces
Pinch of Ground Cloves and Ginger

1. Preheat oven to 375 F. Proof the yeast in the warm water.  Mix all other ingredients, plus the yeast mixture in a mixing bowl. Cover with plastic wrap and allow to rise for 1 hour. It won't rise much and that's ok.
2. Put pecans and walnuts in a food processor and pulse until they are a coarse meal. Some larger pieces are ok.  Add nuts and all other ingredients together and mix thoroughly.
3. Divide the dough in two pieces. Roll on a floured surface into rectangles about 10"x14" (less if you want a thicker, more dense bread). 
4. Spread half of the filling on the dough and roll it fairly tightly into a log. Take a sharp knife and cut the log into sections. How many is up to you but I did between 8 and 10 per log depending on how tall I wanted the rolls to be. Mine were about 1.5" or so tall. Repeat for the second log.
5. Place finished rolls on a baking sheet or in a 9" cake pan (non stick or greased) and bake for 20-25 minutes.

Notes: These keep for several days and you can always make them ahead.  I have never frozen them but I imagine that would also work.

Friday, October 21, 2011

Baguettes


I've been making this recipe for quite a while now.  Thanks to the lovely chica that writes Sugarlaws I found this wonderful and easy recipe for delicious, fluffy, and crusty baguettes.  Because in all seriousness, what is more sensual than the smell of fresh baked bread?


Baguettes (Adapted from Sugarlaws, Yields two loaves)
2 1/2 C. Bread or all purpose flour
1 C. Warm water
1 Package of yeast (11 grams)
1 T. Vegan Sweetener (I used honey, but others will do)
1 t. Salt

1. Preheat oven to 375 degrees.

2. Dissolve yeast in sweetener and water. Let sit for 10 minutes or until foamy. (This is called proofing the yeast)

3. Mix flour and salt. Add water mixture to the flour and knead until blended.

4. Place the dough in a greased bowl, coating all sides of dough. Cover bowl with saran wrap, and let rise somewhere warm for 60 minutes, or until dough has doubled in size.

5. Punch down dough. On a lightly floured surface, roll dough flat into a 12″x18″ rectangle. Cut dough in half to form two 12″x9″ rectangles. Roll up each half of dough tightly, creating a 12″ log. 6. Place each roll 3 inches apart on a greased cookie sheet. Make deep diagonal slashes across loaves every 2 inches. Cover with saran wrap, and let rise in a warm place for 45 to 60 minutes, or until doubled again.

7. Bake for 20 to 25 minutes, or until tops of loaves are just starting to brown.

Baguettes rising before being baked.

Notes: I never get too crazy about step 5.  I just roll it out enough that I can roll it up and it comes out fine. If you want a thicker, and more crusty loaf put a small dish of water in the oven when you put the bread in to bake. This rarely makes it more than two days in my house but once the bread cools completely you can put in into an air tight container to store it.  If you have leftovers that have gone stale you can always make bread crumbs!  Enjoy!


Tuesday, October 18, 2011

Apple Raspberry Bread


Every once in awhile I get something stuck in my head that I just have to make. This bread is one of those things.  I thought about it over and over, compiling what ingredients I would use. When I actually got around to going in the kitchen and making it I of course did it completely different that what I intended.  But it came out so good!  This bread is moist with a slight spiced apple flavor, and wonderful pockets of intense raspberry flavor.  I use raspberries that I picked and froze on a cookie sheet so the raspberries are not stuck together but I think ones from the store would work.


Apple- Raspberry Bread
2 C. Flour
1/2 C. Coconut Milk
1 1/2 C. Apple Pure (about 4 small apples)
1 t. Baking Soda
3/4 C. Honey (or other sweetener)
1/4 C. Agave (or maple syrup)
1 T. Ground Cinnamon
2 T. Flax Meal
1/2 t. Salt
1 C. Frozen Raspberries

1. In a mixing bowl combine all ingredients except raspberries until combined.  Fold in raspberries.

2. Bake for one hour at 350 F in a greased loaf pan.  The bread is done when a toothpick comes out clean.  You might need to add 5-15 minutes depending on your oven.

3. Allow to cool before serving.  Enjoy!


I usually store this bread at room temp in an air tight container.  I have no idea how long it will last that way though because each time I've made this it's only lasted 2-3 days.  Obviously storing it in the fridge would help to preserve its freshness but it's not required.  I eat this bread plain, no need to any butter or spreads!

Sunday, May 15, 2011

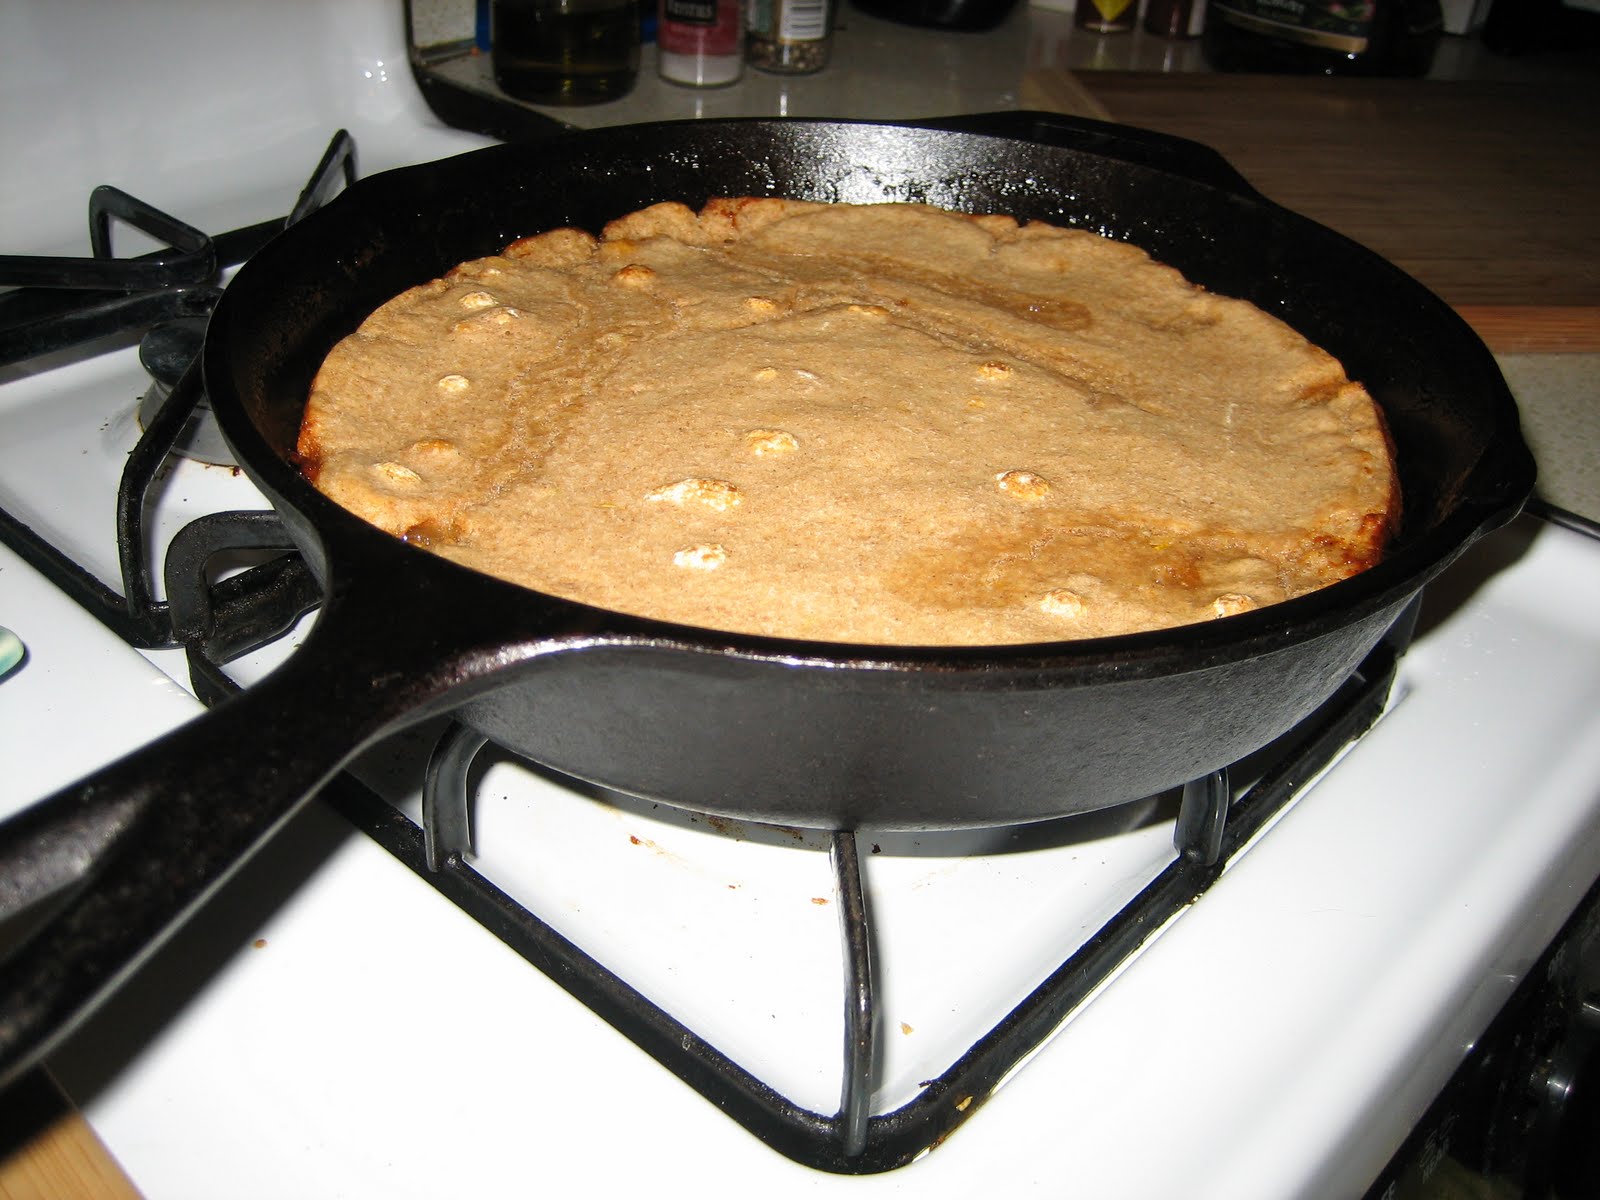
Apple Dutch Baby

The weather is still not great and once again I am stuck inside.  While browsing around the food sites I found a recipe for a "dutch baby" which sounded kind of naughty to me but it was on a food blog so I figured it couldn't hurt to click on it.  I am so glad I did!

This is really a go-to dessert in our house because its so quick and easy and we always have the ingredients to make it around our house.  Its kid friendly, adult friendly, and is also cooked in my very favorite cast iron pan which makes me like it more I think.

Apples Cooking in the cast iron skillet.
Apple Dutch Baby

Filling
4-8 Apples (depending on size and how thick you want your filling), any type, my favorite is granny smith
Cinnamon, to taste
1 T Apple cider vinegar
1 T Water
2-3 T Palm Sugar

Topping
1 C Flour
1/2 t Salt
1/2 t Lemon Zest (optional)
6 Eggs worth of Ener-g Egg Replacer (with the 2T of water per egg)
1 C Soymilk
1/2 t vanilla
1 t Cinnamon

1. Preheat oven to 425 F.

2. Slice apples and place them into a 9 inch cast iron skillet.  Saute them on medium high heat, making sure they do not burn for 4-5 minutes.  Add the rest of the ingredients in the filling to the skillet and continue to saute until the apples are just soft. Remove from heat. Spread evenly on bottom of the pan.

3. In a separate bowl mix all the ingredients for the topping.  It will be a little runny. Pour over the apples and immediately put in the oven.  Bake for 20-22 minutes or until the top is slightly browned.  Allow to cool slightly before serving.

I use a spoon to scoop servings out of the skillet and then flip each scoop upside down so the filling is on top.  This is great with some vegan ice cream or with a splash of soymilk.  Makes a very satisfying late night treat!

The little white spots are baking soda that came out of the bottom of the jar I had in little rocks.  Time for a new jar! 

Saturday, May 14, 2011

Sweet Saturday Morning Muffins

So its been raining a lot lately and I've been finding myself checking the weather daily, waiting for the next sunny day that I can go outside and garden.  Most days start with dewy mornings and end in afternoon rain which leaves me very little time for gardening and yard work and lots of time for cooking!

These muffins take a little bit of prep but they are well worth it.  Three of these is easily a meal and since they are whole wheat, and packed full of carrots, raisins, and apple I dont feel guilty.  They make great snacks, and would be wonderful to have at a brunch.

Sweet Saturday Morning Muffins
Yields 2 Dozen Muffins

2 C Whole Wheat Flour
3/4 C Raisins (black or golden)
3/4 C Palm Sugar
2 t Baking Soda
3 t Ground Cinnamon
1 t Ground Ginger
1/2 t Salt
2 C (generous) Peeled and Grated Carrots (used the food processor for this)
1 Large Granny Smith (or other tart) apple, grated
1/2 C dessicated coconut
1/2 C (generous) Chopped walnuts or pecans, lightly toasted
4.5 t Ener-g Egg Replacer (add 2 T water at the end if needed)
2/3 C Olive oil
1/4 C Fresh squeezed orange juice
2 t Vanilla Extract
Zest of one orange

1. Preheat the oven to 375 F.  Grease muffin tins or line with the papers (I used the papers).

2. Put raisins in a small dish and cover with hot water and allow to soak while you prepare the other ingredients.

3. Combine all the dry ingredients in a bowl.  Add carrot, apple, coconut, nuts, apple, and zest. 

4.  Add all of the wet ingredients plus the drained raisins and mix until combined.

5. Fill the muffin tins 3/4 of the way full.  They will look pretty full, but these muffins do not "puff up" like some other muffins do so don't be shy about filling them up.


These muffins were a hit with vegans and non- vegans alike and as usual barely made it 2 days until they were devoured.  These muffins are great even with out butter and keep well as long as they are in sealed containers so they can be made a day or two ahead if need be.  Enjoy!

Sunday, April 3, 2011

Coconut Bread

This weekend has been all about amazing food! (More on that later) Unfortunately. much of it was so delicious that I didnt have time to snap some photos.  Oh, well, I'll just have to make it again! This recipe I actually adapted from the website Honest Cooking.  Of course the original recipe is not vegan, and uses white flour, so I decided to make my own version which just so happens to be the mouthwatering type of delicious!


Ingredients
1 C. grated unsweetened dried coconut
2 C. Whole Wheat Flour
1/4 C. Raw Agave Nectar
1/4 C. Palm Sugar (granulated)
1/4 C. Honey
1 T. Baking Powder
1/4 C. unrefined Coconut Oil
1 C. Coconut Milk (I use the milk in a can which can separate. I used 3/4 C. of  Solids, and 1/4 C. of the liquid)
1 1/2 t. Ener G Egg Replacer + 2 T warm water
2 t. Vanilla Extract

1. Preheat Oven to 350 F. Put the coconut oil in a metal bowl and place in the oven while it preheats.

2. Toast the Coconut. To do this I simply spread the coconut out on a piece of tin foil and placed it in the oven while it was preheating. Once the perimeter of my coconut started to brown I stirred it with a spoon so it all toasted evenly. About half of the coconut should be lightly browned and it should smell wonderful.

3. In a large mixing bowl combine the flour, coconut, baking powder, and palm sugar.

4. Once the coconut oil is melted remove it from the oven, add the coconut milk, agave, honey, water and egg replacer and stir.  I put the metal bowl over an oven burner on low heat to help melt the coconut milk solids.  Make sure to get out all the lumps by stirring well.

5. Allow wet ingredients to cool slightly.  Just before adding them to the dry ingredients, add the vanilla to the dry ingredients.  Mix wet and dry ingredients until just blended.  Over mixing will cause the bread to be dry and stiff.

6. Pour mixture into a greased loaf pan (no need to flour).  I used cold- pressed olive oil, spreading it around with my hand.  Bake for 45 minutes or until a toothpick comes out clean. (The agave will make it brown quickly but it may not be done inside!)

7.  Allow to cool until the bottom and sides of the loaf pan are just warm to the touch. (10-15 minutes) I use a knife around the outside to loosen up the bread before tipping it out onto a clean kitchen towel. It is very important to allow the bread to cool otherwise it will break apart when you try to remove it from the pan.

This bread is so delicious we often eat it plain, but it is wonderful with earth balance butter.  It is also blissfully delicious when accompanied with a hot cup of good jasmine tea.

Fresh out of the oven!