Showing posts with label Kid Friendly. Show all posts

Friday, October 21, 2011

Baguettes


I've been making this recipe for quite a while now.  Thanks to the lovely chica that writes Sugarlaws I found this wonderful and easy recipe for delicious, fluffy, and crusty baguettes.  Because in all seriousness, what is more sensual than the smell of fresh baked bread?


Baguettes (Adapted from Sugarlaws, Yields two loaves)
2 1/2 C. Bread or all purpose flour
1 C. Warm water
1 Package of yeast (11 grams)
1 T. Vegan Sweetener (I used honey, but others will do)
1 t. Salt

1. Preheat oven to 375 degrees.

2. Dissolve yeast in sweetener and water. Let sit for 10 minutes or until foamy. (This is called proofing the yeast)

3. Mix flour and salt. Add water mixture to the flour and knead until blended.

4. Place the dough in a greased bowl, coating all sides of dough. Cover bowl with saran wrap, and let rise somewhere warm for 60 minutes, or until dough has doubled in size.

5. Punch down dough. On a lightly floured surface, roll dough flat into a 12″x18″ rectangle. Cut dough in half to form two 12″x9″ rectangles. Roll up each half of dough tightly, creating a 12″ log. 6. Place each roll 3 inches apart on a greased cookie sheet. Make deep diagonal slashes across loaves every 2 inches. Cover with saran wrap, and let rise in a warm place for 45 to 60 minutes, or until doubled again.

7. Bake for 20 to 25 minutes, or until tops of loaves are just starting to brown.

Baguettes rising before being baked.

Notes: I never get too crazy about step 5.  I just roll it out enough that I can roll it up and it comes out fine. If you want a thicker, and more crusty loaf put a small dish of water in the oven when you put the bread in to bake. This rarely makes it more than two days in my house but once the bread cools completely you can put in into an air tight container to store it.  If you have leftovers that have gone stale you can always make bread crumbs!  Enjoy!


Tuesday, October 18, 2011

Apple Raspberry Bread


Every once in awhile I get something stuck in my head that I just have to make. This bread is one of those things.  I thought about it over and over, compiling what ingredients I would use. When I actually got around to going in the kitchen and making it I of course did it completely different that what I intended.  But it came out so good!  This bread is moist with a slight spiced apple flavor, and wonderful pockets of intense raspberry flavor.  I use raspberries that I picked and froze on a cookie sheet so the raspberries are not stuck together but I think ones from the store would work.


Apple- Raspberry Bread
2 C. Flour
1/2 C. Coconut Milk
1 1/2 C. Apple Pure (about 4 small apples)
1 t. Baking Soda
3/4 C. Honey (or other sweetener)
1/4 C. Agave (or maple syrup)
1 T. Ground Cinnamon
2 T. Flax Meal
1/2 t. Salt
1 C. Frozen Raspberries

1. In a mixing bowl combine all ingredients except raspberries until combined.  Fold in raspberries.

2. Bake for one hour at 350 F in a greased loaf pan.  The bread is done when a toothpick comes out clean.  You might need to add 5-15 minutes depending on your oven.

3. Allow to cool before serving.  Enjoy!


I usually store this bread at room temp in an air tight container.  I have no idea how long it will last that way though because each time I've made this it's only lasted 2-3 days.  Obviously storing it in the fridge would help to preserve its freshness but it's not required.  I eat this bread plain, no need to any butter or spreads!

Monday, October 10, 2011

Kitchen Review- The Blend- Tec

Even though I am super busy with Vegan MOFO (day 10!) I've had time to reflect a lot lately.  Maybe its the fact that my kitchen needs constant cleaning because I've been cooking every day or maybe its the never ending pile of dishes.  I'm not sure.  What I am sure about is that I couldn't do alot of what I do in the kitchen without my Blend-Tec.

I've owned alot of hand-me-down blenders in my day.  Most of them were freebies, all of them broke within a year and never worked well at all.  At one point I was a raw vegan (no cooked food or animal products) and a blender was a vital kitchen appliance.  Even though Im back to just being vegan now I still use this blender almost daily.  Let me give you some examples:


I made all those things and more with a blender.  Now on to other important matters.  I would say some pro's of this blender is that it will blend everything you may ever need to blend while cooking and it will do an amazing job at it. It's also really easy to clean and easy to use a spatula in order to scrape out whatever it is you blended.  The wider base makes it more effective at blending thicker things like filling for a cheesecake (its the only way I make cheesecake filling now because its so fast!), or nut butters.  I've blended ice, and even frozen bananas (for my ice cream) with ease.  I have yet to be disappointed with this blenders performance.  The biggest thing for me is that the base is really easy to clean, just wipe down with a sponge or paper towel.  It has a digital screen and flat buttons that make it a breeze to clean up.

I would say the only real con to this blender is the noise.  Unfortunately, I haven't seen a blender this powerful that wasn't noisy.  Some claim the Vitamix brand is less noisy but I call b.s. on that.  All I can say is that I'm so happy with how well it works that I can forgive the noise.  It's so nice to have smoothies without berry seeds in them (the blender grinds them up) or random chunks of ice.  I can even make a quick soup in minutes.  The convenience of this appliance is a huge benefit.

Well enough about the blender.  If you're in the market you would love the Blend Tec, worth every penny.  Now I have to get back in the kitchen and clean because tonight we are getting started on making hard cider! I'll post all about it tomorrow!

One final thought: What do you use your blender for? I'm looking for new ideas!

Thursday, October 6, 2011

Mango Raspberry Smoothie

I found out that this week one of my friends is going on a 10 day raw fruit smoothie cleanse! Yay! I'm so glad I can inspire my friends to try new things and explore food! I'm dedicating this post to all those who are trying new things!

The base of this smoothie is really the mango.  It gives a thickness and a creaminess to the smoothie that is so luxurious.  This is a great quick breakfast or snack, and is packed full of vitamins and nutrition. 

Mango Raspberry Smoothie
1 large mango, peeled and cubed
1 large very ripe banana
1 package of raspberries (or 6 oz of frozen berries)
1 apple cored and cubed (optional)
Ice (optional)

1. Put everything in the blender and blend until smooth. Enjoy!

Wednesday, October 5, 2011

Chewy Pumpkin Cookies


Usually I am a die hard chocolate chip cookie fan but in the fall I love the flavor of pumpkin.  To me it's just an added bonus that pumpkin is also good for you.  I think it's even better for you when paired with chocolate! I adapted this from a recipe on Have Cake, Will Travel.


Chewy Pumpkin Cookies (Yields 12 large cookies)

1 C. Whole Wheat Pastry Flour
1 C. Ground Oats (oats ground up in a food processor)
1 1/2 t. Ground Cinnamon
2 T. Arrowroot Powder (heaping, very heaping)
1/2 t. Sea Salt
1 t. baking powder
1/2 C. Vegan Butter (or vegetable shortening)
1 C. Palm Sugar (other other vegan granulated sugar)
1/2 C. Honey (or other vegan sweetener)
3/4 C. Pumpkin Puree (be generous)
2 t. Vanilla Extract
1 C. Chocolate chips (you can put in slightly less if you don't like as much chocolate)

1. In a large bowl cream together the sweeteners and the butter or shortening with a mixer.  Add in the vanilla and pumpkin until combined. 

2. Mix together the dry ingredients in a separate bowl.  Fold them into the wet ingredients and mix until combined.  Add the chocolate chips and stir again.

3.  Using a spoon place dollops of cookie dough on a greased cookie sheet and shape them how you would like them.  They wont rise much so flatten them a little.  Put in the fridge until dough is chilled.

4. Preaheat oven to 350F and bake for 17 minutes or until golden brown on the edges.  It may be hard to tell if they are done but a good way to check is to look at the bottoms.  Nicely browned bottoms mean they are done :)

Notes: Baking these too long will cause them to dry out.  If you don't want to bake all the dough you can always freeze some in cookie shaped discs for later!  Store in a sealed container on the counter. 

Monday, September 26, 2011

Vanilla Chai Pear Butter


The other day I wasn't feeling so good.  It was raining, I had a headache, and I had to run a lot of errands when I would have rather been snuggled up inside reading a book and drinking hot tea.  When I finally got home after running the errands I was determined to do something that I wanted to do. What I wanted to do at that moment was make pear butter.

I have fond memories of eating preserved pears right out of the jar when I was a young child.  The syrupy sweetness and softness of the canned pears was my favorite part.  Even though my mom only canned the pears from our tree (or anywhere) once I still remember eating them to this day, more than fifteen years later. I've learned the hard way not to try and re-create the memories of things from my childhood (often ends in disappointment) but I decided to honor those memories with this pear butter.


Vanilla Chai Pear Butter (Yields  four 8oz jars)
8 Pears (I used 4 Bosc and 4 Bartlett)
1.5 inches of cinnamon stick
6 cardamom seeds
Juice of one lemon
1/4 to 1/2 C. Honey or vegan sugar (adjust depending on how sweet you like it)
2 t. Vanilla Extract

1. Peel and core the pears.  Cut into small chunks and put in a crock pot.
2. Add the cinnamon stick and cardamom to the crock pot and allow to simmer for several hours until the pears are very soft.  Remove the cinnamon and cardamom when you are happy with the taste/aroma.  I left mine in for around 3 hours but you may want more or less flavor.
3. Allow pears to cool slightly then transfer to a blender and blend until smooth.  You may have to do this in a few batches, be careful of blending hot things!
4.  Return butter to the crock pot and continue to reduce if necessary. Add the vanilla. If the consistency is how you would like it simply heat the butter until it is just shy of boiling and then put in canning jars.  Water bath can for 15 minutes.

Notes: I know there is a lot of controversy surrounding whether or not to water bath these after canning.  I have made fruit butters many times and not always water bath canned them after. For safety I would put these in a water bath though.  Better safe than sorry!  I'm lucky if the butters last longer than six months since I usually give them away as gifts.  I also use very very ripe pears for this recipe.  Should you not want to can this butter you can allow it to cool and freeze it.  Enjoy!

Five Minute Applesauce


I like applesauce. I think it's natures candy and I love it. It's simply one more thing in life that I greatly appreciate. 

Unfortunately I think the stuff they sell at the store is only good for baking and instead I buy apples and make my own.  There is one thing that Michigan does really really well, and that is growing apples.  So when I saw Michigan apples at the store on sale I bought two bags.  This recipe is super easy, takes 5 minutes, tastes like you spent all day making it, and can be stored in the fridge for quite a while (if there are leftovers).


Five Minute Applesauce
6-7 medium sized apples, cut off the core (no need to remove the skins, adds some texture)
Cinnamon, to taste
Maple syrup (optional, depending on the apples it could be plenty sweet without)
Pinch of salt (optional)
1/2 C. Water

1. Put everything in your blender.  If its having trouble blending you can add more water, but not too much!
2. Blend until smooth.
3. Heat in a sauce pan over the stove until warm (do not boil!) Enjoy!

Notes: If you made too much and you want to store some I put hot applesauce in mason jars with fresh lids and as they cool they suction the lids down.  The applesauce is safe like this for a few days, after that put it in the fridge where its good for a few weeks.  I use this in baking instead of eggs or to give things more moisture, and also use it as a topping for my Easiest Ever Ice Cream.

Monday, August 15, 2011

Chilled Cantaloupe Soup


Each and every summer time just gets away from me.  I know its been unforgivably long since my last post and for that I am truly sorry.  It must have been terrible going without awesome vegan food. :P

Things have gotten pleasantly busy over the last month.  Fortunately I have had some spare time to cook delicious vegan things which I will attempt to share with you as often as possible as we reach towards the end of summer.  I made this soup during a particularly hot week and it was incredibly refreshing.   This can be served in a traditional bowl, or in shot glasses as "shooters" which is a good appetizer.  I personally just like how easy it is and how people seemed to be impressed and curious about it at the same time. 

Chilled Cantaloupe Soup:
2 small cantaloupes, peeled, cut in chunks
1 t. dried tarragon flakes
Juice of two large limes
1/3 C Fresh cilantro, packed
2 small shallots
1 t salt, or to taste

1. Sweat the shallots making sure to not let them brown at all.
2. Add all ingredients in a blender and blend until very smooth.
3. Refrigerate a few hours to overnight to allow the flavors to mingle. Taste and adjust spices/lime to your liking. Serve chilled.

Notes: DO NOT use onion in place of the shallots, the soup comes out tasting like vomit :( Also feel free to be generous with the lime and cilantro. Enjoy!
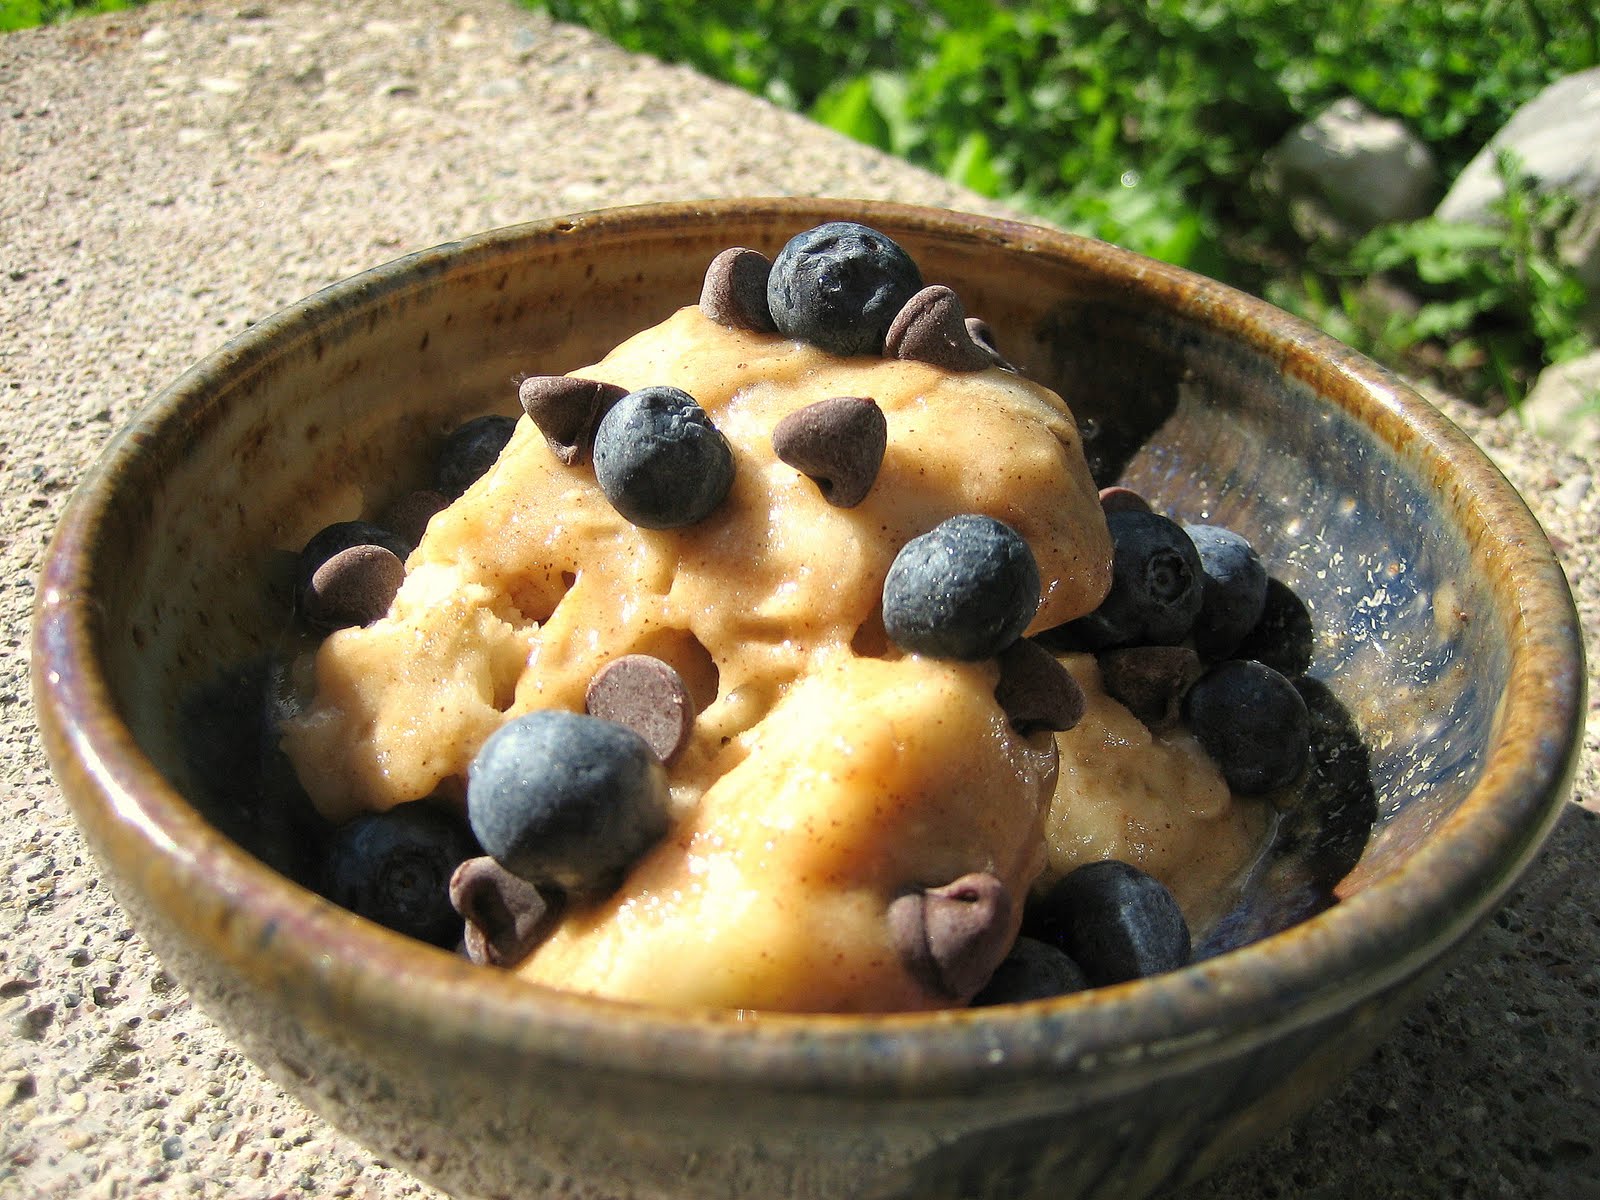
 Here is the photo I promised of the banana ice cream! Mine is topped with chocolate chips and blueberries but there are many many toppings that are delicious!

Saturday, June 18, 2011

Easiest Ever Ice Cream!


So last week was what they call "Restaurant Week" which is where several restaurants participate in offering deals for lunch and dinner (sometimes both!).  Sometimes they have special menu's they prepare and it's always a great way to try out new foods, and lots of them!

So that is my excuse for having not cooked in a week.  I did however decide to make some of this ridiculously easy ice cream which tastes delicious. It's a little bit like the consistency of frozen yogurt, but in my opinion it tastes better.

Photo taken by kitchen partner Dan :)
Ice Cream

Very ripe bananas, cut into 1/4" slices


Optional Flavorings
Vanilla Extract
Lacuma (gives it a caramel like flavor)
Any other kinds of fruit (my favorite is mixing in blueberries at the end)
Cocoa Powder
Peanut butter

1. Line a cookie sheet with wax paper.  Spread out banana slices.  Add another piece of wax paper on top if you need room for more slices.

2. Cover with plastic wrap.  Freeze a few hours or overnight.

3. Blend 1-2 cups of frozen banana slices at a time in a blender.  Note: The more powerful the blender the more banana slices you can add at once but be conservative at first! Use a spatula to scrap down the sides and pulse the banana until creamy.

When it comes to adding flavors its better to add too little and have to add more than to add too much at once.  If you are using a flavoring like cocoa powder (I have some that is raw) you may need to add some agave nectar or other sweetener.  You can eat this plain, which is what I do, or mix in some fresh fruit for some extra pockets of flavor.  Contrary to what you would think this is not overpoweringly banana flavored. I like adding some homemade vanilla to mine and maybe a crack of sea salt. :)

Once frozen the bananas can be transferred to a zip lock bag and kept in the freezer for quite a long time if need be.  Some times I have this "ice cream" in the morning instead of my normal breakfast smoothie. 

I apologize for there being no end picture.  I will try my best to remedy that soon! I just wanted everyone to be able to enjoy this recipe while the weather holds!

Saturday, June 11, 2011

Kickin' Ketchup - Incredibly Addictive

So since I've been making some confessions lately I figure I shouldn't stop now.  I am addicted to ketchup.  At first I thought it was simply the white sugar it contained but after switching to agave sweetened ketchup I was still buying it in bulk and purposefully making things to put it on.  Back in the day I bought ketchup in 64oz containers, they were like the free weights you would use at the gym.  Yes, I think it's safe to say I have a problem.


But from my addiction sprang something even better than store bought ketchup.  This ketchup is not just one straight up flavor.  It has layers of complex flavors.  Its savory, thick, and doesn't separate (no more ketchup water!). I want to spread this stuff on every thing from veggie dogs (done), garlic fries (done several times), toast, sandwiches, pizza, and really any form of potato.  I can't help myself.  It's that good.

Kicking Ketchup

Makes about 3 1/3 Cups

2 12oz cans tomato paste, no salt added
6 cloves garlic, minced
2 T. Olive Oil
1 T. Onion Powder
2 T. Balsamic Vinegar
2 T. Apple Cider Vinegar
1/4 C. Honey
1/4 C. Agave
1/2 T. Chili Powder
1 T. Parsley
1 T. Dill
1 t. fine Sea Salt
1/2 t. Fresh ground black pepper
1 t. Hot Sauce (I use Tabasco Habanero hot sauce, pictured above)
2 T. Warm water

1. In a medium sauce pan saute the garlic in the olive oil until just golden brown. Remove from heat.

2. Add all other ingredients.  Start with the liquids (to stop the garlic from cooking further), then add the spices and tomato paste.  Stir thoroughly to combine everything.

3. Heat on medium low for 5 minutes, stirring frequently if not continuously (you don't want it to burn!).  Make sure to scrape the sides and bottom of the sauce pan.  Remove from heat and allow to cool completely before refrigeration. 

Notes: I store my ketchup in an old squeeze bottle that used to hold agave but any bottle will do.  I've also put it in mason jars (they make great gifts!) and just used a spoon to smother whatever I'm eating.  This ketchup is really best when it has time to sit over night.  You can use it right away but the flavors really get better after it's had a chance to sit. 

I've been asked a lot if I have tried canning this.  I have not (yet!) but since it's very acidic you probably could.  In the future I will try it and let you know how it goes.  I might attempt it before Christmas so I could add a small jar to the gift baskets I make.

Now, go forth, fearlessly into your kitchens and create this sauce from heaven.

As a bonus, if you successfully can this recipe (with few alterations) and tell me how you did it I will mail you a wonderful gift as a thanks!

Hot Ketchup

Wednesday, June 8, 2011

Banh- Mi (Vietnamese Sandwiches)

So I have a confession to make.  Its beyond too hot to cook today, the same thing happened yesterday.  But today I wanted to make something refreshing and ethnic.  Something very non- American.  Ladies and gents, allow me to introduce the Banh- Mi.  Its gloriously simple, packed full of flavor, and has very little cooking involved.

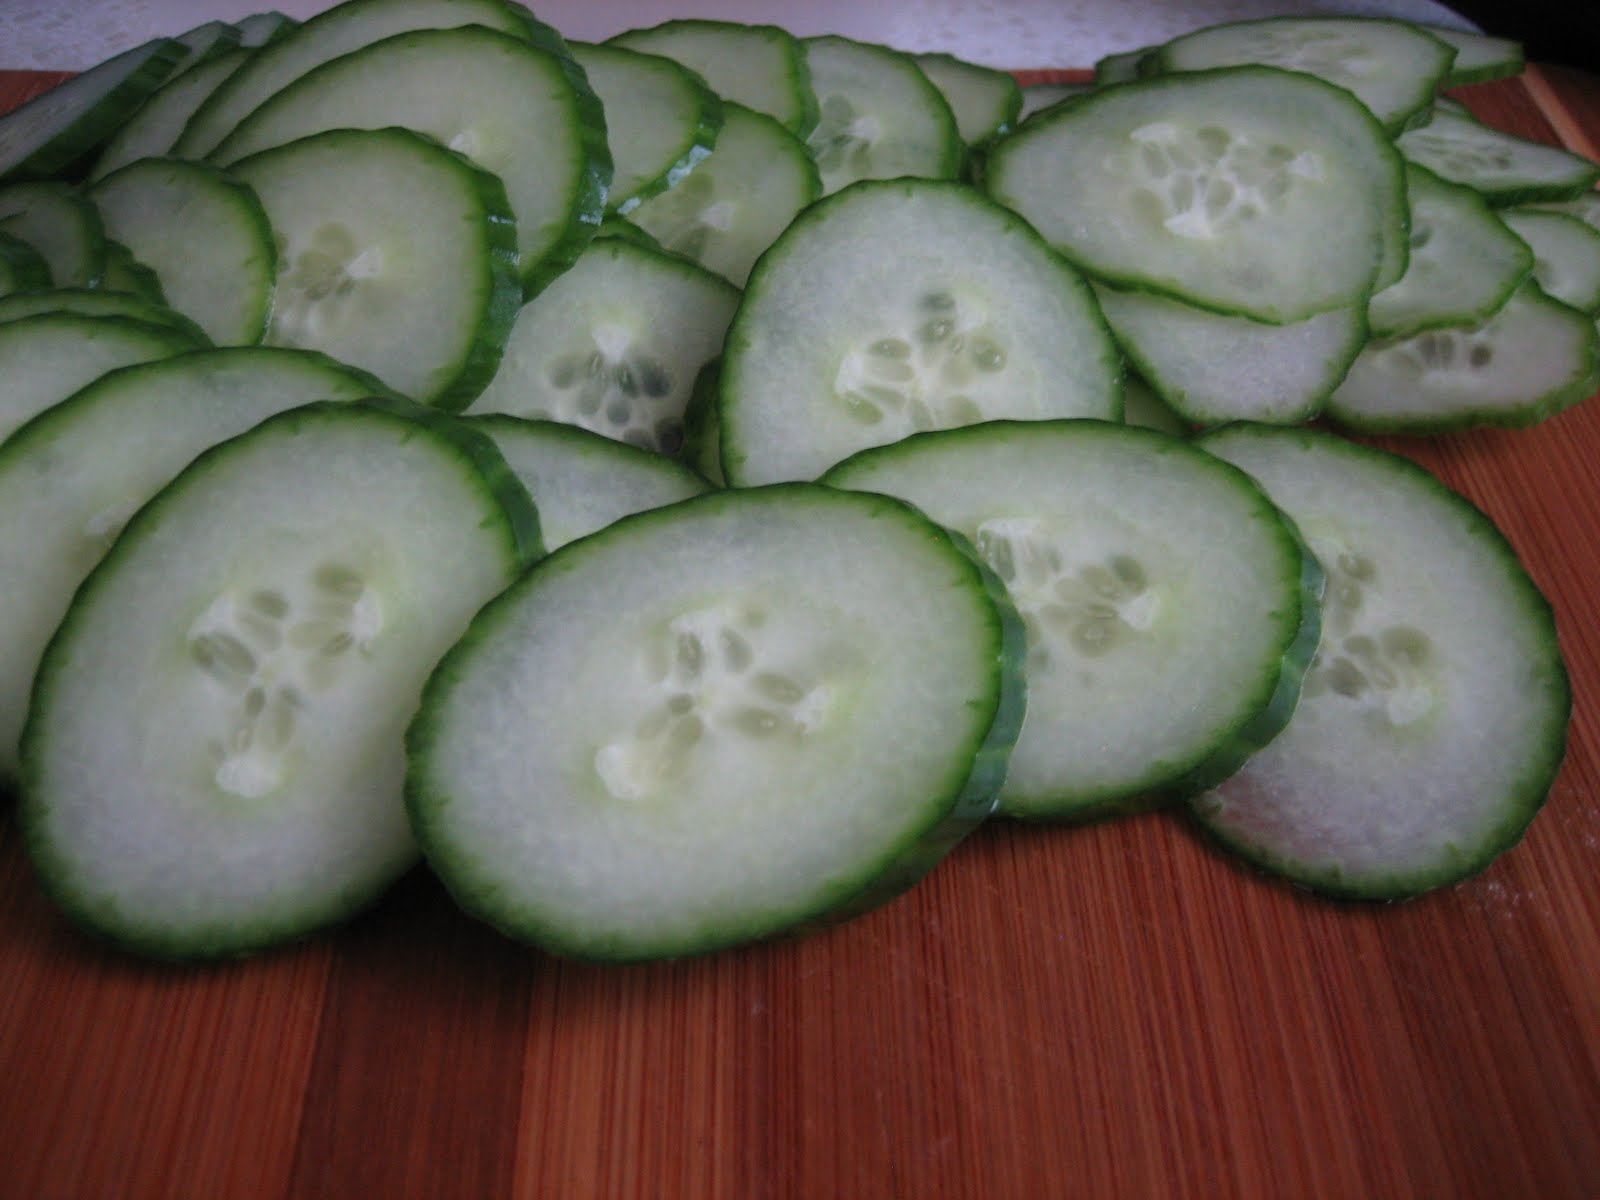
But first let me just say that this sandwich is customarily not vegetarian although it is really delicious anyway.  I choose to top it with cucumber although other vegetables such as carrots and pretty much anything yummy and crunchy is suitable. Another common topping is mayonnaise, which is great but I couldn't resist putting my own twist on that as well.

Garlic- Avocado Mayo
1 ripe avacado
3-4 T. Vegan Mayonnaise
2-4 Cloves of garlic, minced
Juice of one lime
Salt and Pepper to taste

1. In a small bowl roughly mash the avocado.

2. Add all the other ingredients and combine well.

Keeps well in the fridge in a sealed container.  To keep it from browning add the avocado pit to the container.  Also makes an excellent spread for breads.

Banh- Mi Tofu

1 pkg of firm tofu, cut in 8 slices
1/4 C. Olive Oil
2 cloves garlic, minced
5 T. Soy sauce
2 t. Salt
2 t. Pepper
1 T. Sesame oil
1t. Dijon mustard
Juice of one lemon (about 2T.)

1. Place all ingredients except tofu into a large zip-lock baggy or seal-able container. Combine well.

2. Add tofu to marinade and allow to sit for a few hours or preferably overnight.  Shake up the container every once in a while to make sure all the tofu is being soaked by the marinade.

3. Preheat oven to 350 degrees F.  Put tofu on a cookie sheet.  Brush the top of the tofu with the marinade and bake for 5-10 minutes.  Flip tofu, brush other side with marinade and bake for another 5-10 minutes or until each side is slightly browned.

Finished Sandwiches!
I used burger buns for my sandwich but you could use some kind of rustic more traditional sandwich bread if you prefer.  I spread a generous amount of the mayo on the top piece of bread. Also I chose to keep it simple and just use sliced cucumbers as my topping since the mayo and tofu had so much flavor to it. Feel free to try other veggies like shredded carrots, sprouts, daikon, or any fresh herbs.  As an added bonus I toasted my bread so it wouldn't get soggy and it added a nice crunch and mouth feel to the overall sandwich.

This sandwich is pretty quick and super easy.  Don't fret if you don't have one of the ingredients for the marinade, just substitute something close. If you don't like mayo you can use hummus, or a bean dip instead.  It may be less traditional but it's still super tasty!

Tuesday, June 7, 2011

Sun Tea FAQ

Ok, so it might seem silly to have a post about Sun Tea but it seems necessary.  Given that tomorrow is going to be 87 degrees and ungodly humid on top of that.  Here are some guidelines for making sun tea.


Looseleaf teas
  • Use 1 t. of loose tea for every 6 oz of water.  
  • I use a coffee filter to hold my tea, and secure it with a rubber band.
  • Use teas that will brew to their fullest flavor in warm water.  (avoid thai tea, cinnamon, vanilla, cardamom, chai) Good choices include black tea, green tea, and white tea varieties.  
  • Do not allow the ball of loose leaf tea to steep overnight.  This will make your tea bitter.  Use a proper storage container for your tea such as glass or a BPA free plastic container. (I use a 2 quart mason jar)
Bag Tea
  • Use 4-6 tea bags for 2 quarts of tea.
  • See above guidelines for picking tea and storage.
  • DO NOT squeeze the tea bags when removing them.  This will make your tea bitter.
 Notes
  • I use agave nectar to sweeten my tea.  It dissolves very quickly into cold liquids with minimal stirring and only barely changes the color of the drink.  Its also a low glycemic index sweetener so you won't suffer from sugar spikes and crashes.
  • Feel free to experiment with different teas! If you're not sure the tea is done, have a taste!
  • I always chill my tea after it's done brewing and I remove the tea ball.  That way my tea isn't diluted by melting ice cubes.
Happy Summer!!

Rhubarb Upside Down Cake

I'm a huge fan of rhubarb.  A really really big fan. So when I saw rhubarb appearing at the farmers market, (and I started having dreams about eating it) I decided to do something about it.  After tweaking the recipe several times I've finally come up with something that I'm quite happy with and is also quick to make.

*See Below
Rhubarb Upside- Down Cake
Makes one 9 inch cake.

One 9 inch cake pan

Cake:
1/2 C. Palm sugar
1-2 T. Earth Balance vegan butter
2 T. agave nectar
4 C. Rhubarb, sliced 1/4 inch thick
1 3/4 C. Whole wheat pastry flour
1 t. baking soda
1 t. sea salt
1 C. Palm sugar or granulated sugar
1/2 C. Coconut oil
1 C. Coconut milk
1 T. pure vanilla extract
Juice from one Lemon (about 2 T.)

1. Preheat the oven to 375 degrees. Generously grease pan with butter. It is wise to line the bottom of the pan with parchment paper to ensure nothing sticks.  Coat greased pan with 1/2 C. palm sugar. 

2. Spread rhubarb evenly in the bottom of the pan and drizzle with Agave nectar. Set aside.

3.   Whisk together flour, baking soda, and sea salt in a large bowl. In a smaller bowl whisk sugar, oil, milk, and vanilla extract. Add the wet ingredients into the dry until well blended. Whisk in lemon juice vinegar and stir quickly (pale swirls will be in the batter, which is the baking soda reacting with the lemon juice).

4. Pour cake batter over rhubarb,  and bake until toothpick inserted into center comes out clean, about 45-50 minutes.

5. Cool cake for about 5 minutes in pan then place a plate on top, hold firmly and flip over to un-mold. Remove the parchment paper carefully (if you used any).

Fresh out of the oven!
In the end I think all my obsessing over this recipe really paid off.  Afterall, I got to make and eat this lovely cake 3 times in the pursuit!  It's become a favorite in my house so I'll probably have to make it again soon!

Notes: If you do not have palm sugar you can substitute brown sugar in equal amounts.  Maple syrup can also be used instead of agave nectar.


*Photo Courtesy of FreeDigitalPhotos.net.

Saturday, May 28, 2011

Stuffed Shells with Roasted Red Pepper Marinara

Lately its been raining a lot here, even for springtime. So I've been cooking a lot and made up this recipe.  It's a very rare occurrence that I write down a recipe after having just made things up as I went along.  This time I didn't even print out other recipes for inspiration.  I just decided I wanted stuffed shells one day, and I wanted them to be vegan stuffed shells. I wish I could say this made four servings (probably would if you ate normal portions) but my significant other and I polished this off for lunch.  It was awesome.

This was really good.  So good in fact that I forgot to be patient and just piled the shells into a bowl.  The smell is warm, and intoxicating.  The roasted red pepper really hits the spot.

1 box large Shells
1/2 Package Follow Your Heart Mozzarella, shredded

*Cook a box of shells according to the directions on the package minus a minute or two.  You want them to be a bit al dente so after they are baked they are perfectly cooked.  Drain after cooking.

Finished Roasted Red Pepper Marinara


Roasted Red Pepper Marinara
29 ounce can tomato puree
1 red pepper, roasted, skin removed, or 3/4 C pepper pieces from a jar.
4 Garlic Cloves
1 T. Italian Seasoning
1 t. Hot sauce
Salt and Pepper to taste.

1. Put everything into a blender and blend until velvety smooth. 
2. Pour into a small sauce pan and simmer for 10-15 minutes

Had to get a close up of the super creamy "ricotta" stuffed shells.


Tofu  "Ricotta"
1 Package extra firm tofu
4 T. Vegan Mayonaise
4 cloves garlic, minced
4 T. Nutritional Yeast
1 T. Italian Seasoning
1.5 t. Ener- G- Egg Replacer
Salt and Pepper to taste.

1. Drain the tofu and crumble into a bowl.  Add all the other ingredients and use a fork to mix them well.
2.  Using a spoon stuff each shell with the ricotta mixture.  Put any damaged shells into a separate bowl (you can eat them with some leftover sauce later)
3. Line up each stuffed shell in a greased 8x8 pan.  Pack them in kind of tight.
4. Pour the marinara sauce over the finished stuffed shells.  Move the shells around a little bit to make sure that some sauce gets in between them and that each shell is coated in sauce.
5.  Sprinkle shredded mozzarella on top.
6. Bake at 375 F for 20-30 minutes, uncovered.

Someone asked what the package looked like.  Of course now that I have posted this I believe they have changed the packaging. 

Fully Assembled, about to be baked!

Sunday, May 22, 2011

Winning Alfredo with Broccoli

I decided to make this for dinner on a whim.  I read a lot about how fellow vegans were having trouble making a good alfredo sauce and I was eager to try my hand at it. The trick here is to resist the urge to add any liquids such as soymilk or water.  That way you will get a delightfully thick and creamy sauce, packed with flavor.


Winning Alfredo with Broccoli


1 block of Mozzarella (I use Follow Your Heart brand) cut into centimeter sized cubes.
2T Vegan Butter
3 Cloves of Garlic, minced
1/3  C Nutritional Yeast
2 T Parsley Flakes
1 t Fine Sea Salt (or to taste)
½ t Fresh Cracked Black Pepper (or to taste)
1/3 C Veganaise (I use Follow Your Heart, the variety made with Grape seed oil but the original also works)
¼ C Olive oil
1 Head of broccoli, cut into small florets, discard stalk and stems (or freeze them for making stock later)
13.5 oz box of curly pasta such as rotini
5 Green onions, white and light green parts thinly sliced (optional garnish)

1.       Begin heating water to cook the pasta.  Start on the sauce while you wait for the water to boil and the pasta to cook.  Do not discard the water you cooked the pasta in.  Use a slotted spoon to remove the pasta from the sauce pan and place it in a colander to drain. Move to a large bowl or serving dish.

2.       In a medium saucepan melt butter and add garlic.  Saute until the garlic becomes fragrant (a few minutes).  Add olive oil and mozzarella and mix together making sure no garlic is left sticking to the bottom of the pan.

3.       Continue cooking mixture on medium heat, stirring frequently.  Once the cubes have melted slightly (about 3 minutes)  add the nutritional yeast, parsley, Veganaise, salt and pepper (add less salt and pepper than you think you need, you can always add more once you taste).

4.       After you have removed the pasta from the water it was cooked in, add warm water if necessary and bring it back to a boil.  Add the broccoli and cook for 3-5 minutes (depends on the size of the florets).  They should be soft but not mushy.  Drain and add to pasta.

5.       Taste the sauce and add salt and pepper if needed.  Pour over pasta and broccoli and stir to combine.  Serve hot.  Optional: Garnish with the green onions by sprinkling them on top just prior to serving.